In this article, we will discuss "How to use trackBy in Angular". Basically, "trackBy" is used to improve the performance of an angular application. Today, I will try to explain the use of trackBy with an example.
Why do we need trackBy in Angular?
By default, no need to use trackBy in Angular. But with large collections of data, angular ngFor directive may perform poorly. For example, a small change of data such as adding a new record, editing, or deleting a record from the collection. The angular framework will remove all the DOM elements that are associated with the data and will create them again in the DOM tree even if the same data is coming. Here, a lot of DOM manipulation will happen in the background if a large amount of data comes from the API then the application performance will suffer.
Angular trackBy example
Angular provides us function trackBy which helps us to track the items which have been added or deleted. The trackBy function takes two arguments, the first is the index and the second one is the current item. That will return one unique identifier and the same we can use to track the item. In this example, we are going to track the item id.
Update app.component.html
Open your component HTML file and update the following code in your file. As per the example, I'm updating app.component.html.
<table>
 <thead>
 <tr>
 <th>ID</th>
 <th>Name</th>
 <th>Action</th>
 </tr>
 </thead>
 <tbody>
 <tr *ngFor="let item of store; trackBy: trackByFn">
 <td> item.id </td>
 <td> item.name </td>
 <td><button (click)="deleteItem(item.id)">Delete</button></td>
 </tr>
 </tbody>
</table>

<button (click)="addItem()">Add item</button>
In order to use trackBy, add the following method in the app.component.ts file.
trackByFn(index, item)
 return index;
Update app.component.ts
Open app.component.ts and update the following code in it. As you can see in the below code, I initialize the data collection which contains id and names.
import Component from '@angular/core';

@Component(
 selector: 'my-app',
 templateUrl: './app.component.html',
 styleUrls: ['./app.component.css'],
)
export class AppComponent
 name = 'Track By Example';
 store: any;

 constructor()
 this.getData();


 getData()
 this.store = [
 id: 1, name: 'John' ,
 id: 2, name: 'Doe' ,
 id: 3, name: 'Test' ,
 ];


 trackByFn(index, item)
 return index;


 getNewData()
 this.store = [
 id: 1, name: 'John' ,
 id: 2, name: 'Doe' ,
 id: 3, name: 'Test' ,
 id: 4, name: 'Sam' ,
 id: 5, name: 'Kelly' ,
 id: 6, name: 'Thor' ,
 ];
Working example
[embed_iframe link="https://stackblitz.com/edit/angular12-trackby-example?embed=1&file=src/app/app.component.html&theme=dark" title="Angular trackBy Example"]
Difference with or without trackBy
Let's check the difference, first, we run our example without the use of trackBy. When we click on the more items button then six records return. All those recreated in the DOM tree. Check the following screenshot.
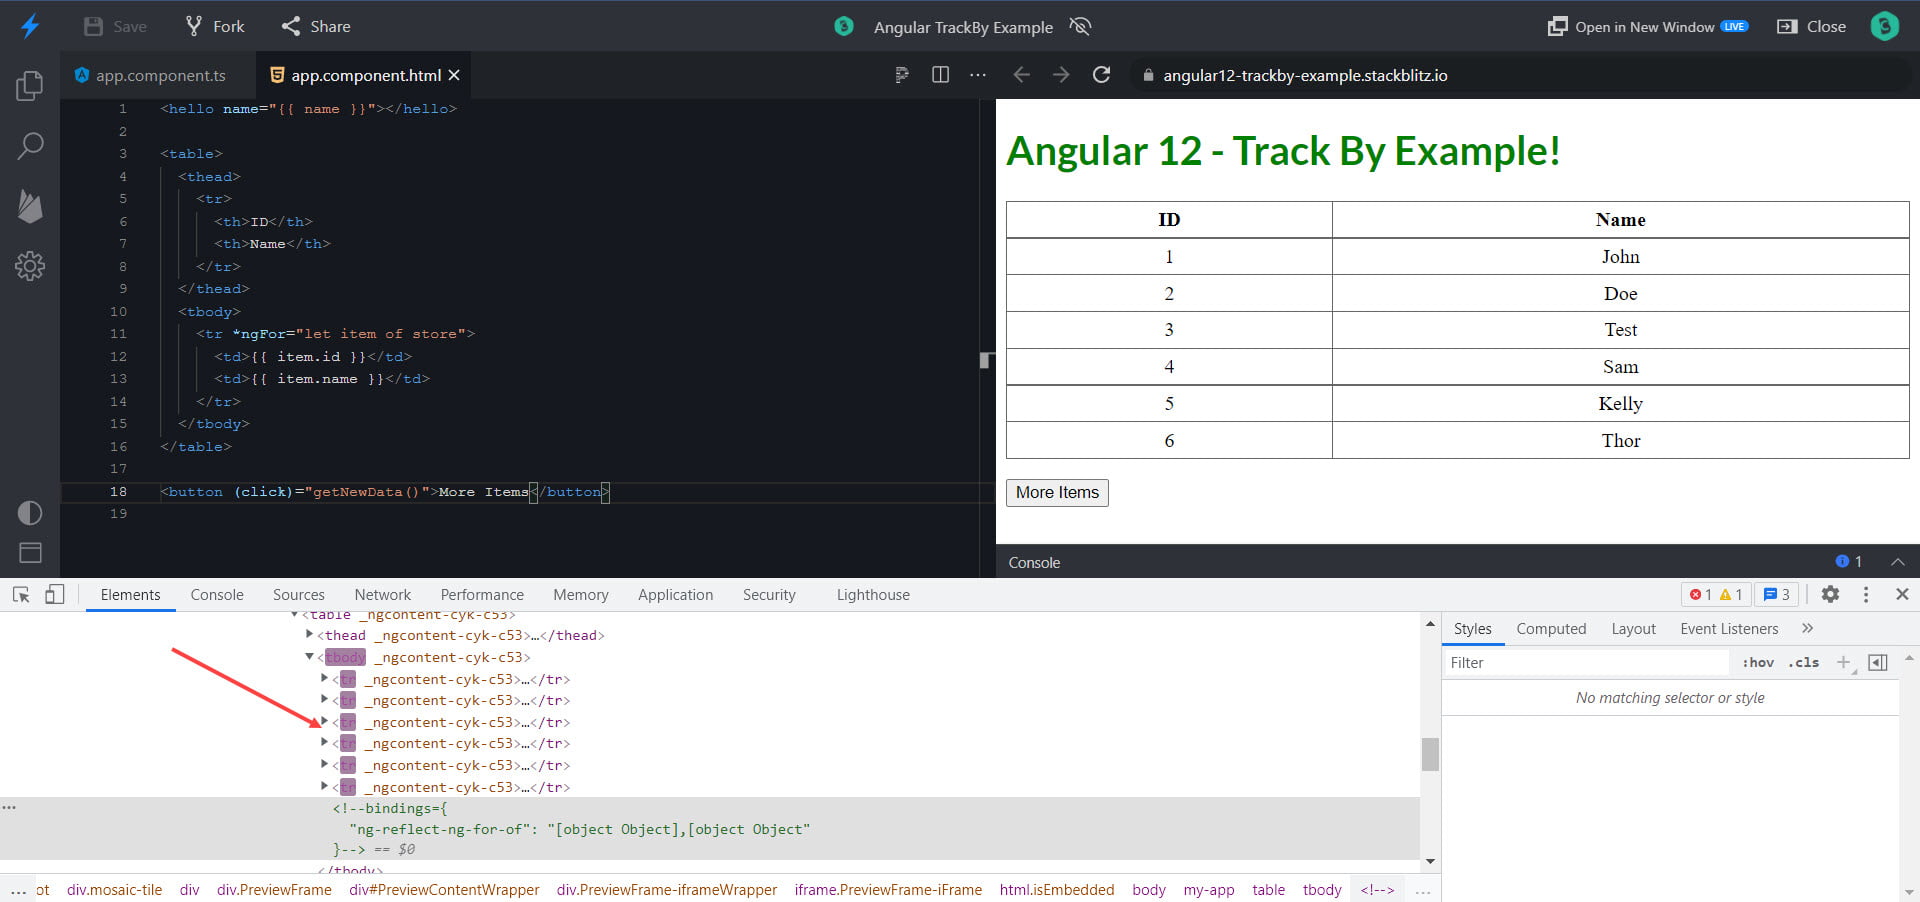
Second, we run our example with the use of trackBy. When we click on the more items button then six records return. But only three new records created in the DOM tree. Check the following screenshot.

Conclusion
In this article, we are discussing "How to use trackBy in Angular". Hope you like this article, and got exposure to the trackBy and its use in Angular. Please feel free to add your comments in any query, or send me your feedback.
Keep learning & be safe :)
Comments
Post a Comment