In this series of articles, we will discuss AWS Pinpoint and how to set up the pinpoint project with two-way communication and delivery reporting via AWS Kinesis Data Stream. Today, I will try to explain to you "How to Setup AWS Pinpoint.
What is Pinpoint
Amazon Pinpoint is an AWS service, you can use this to send push notifications, SMS, emails, or voice messages. It's easy to set up, flexible, and easy to use. Check here for details of pinpoint pricing.
How Pinpoint Works
[caption id="attachment_2632" align="aligncenter" width="1024"]
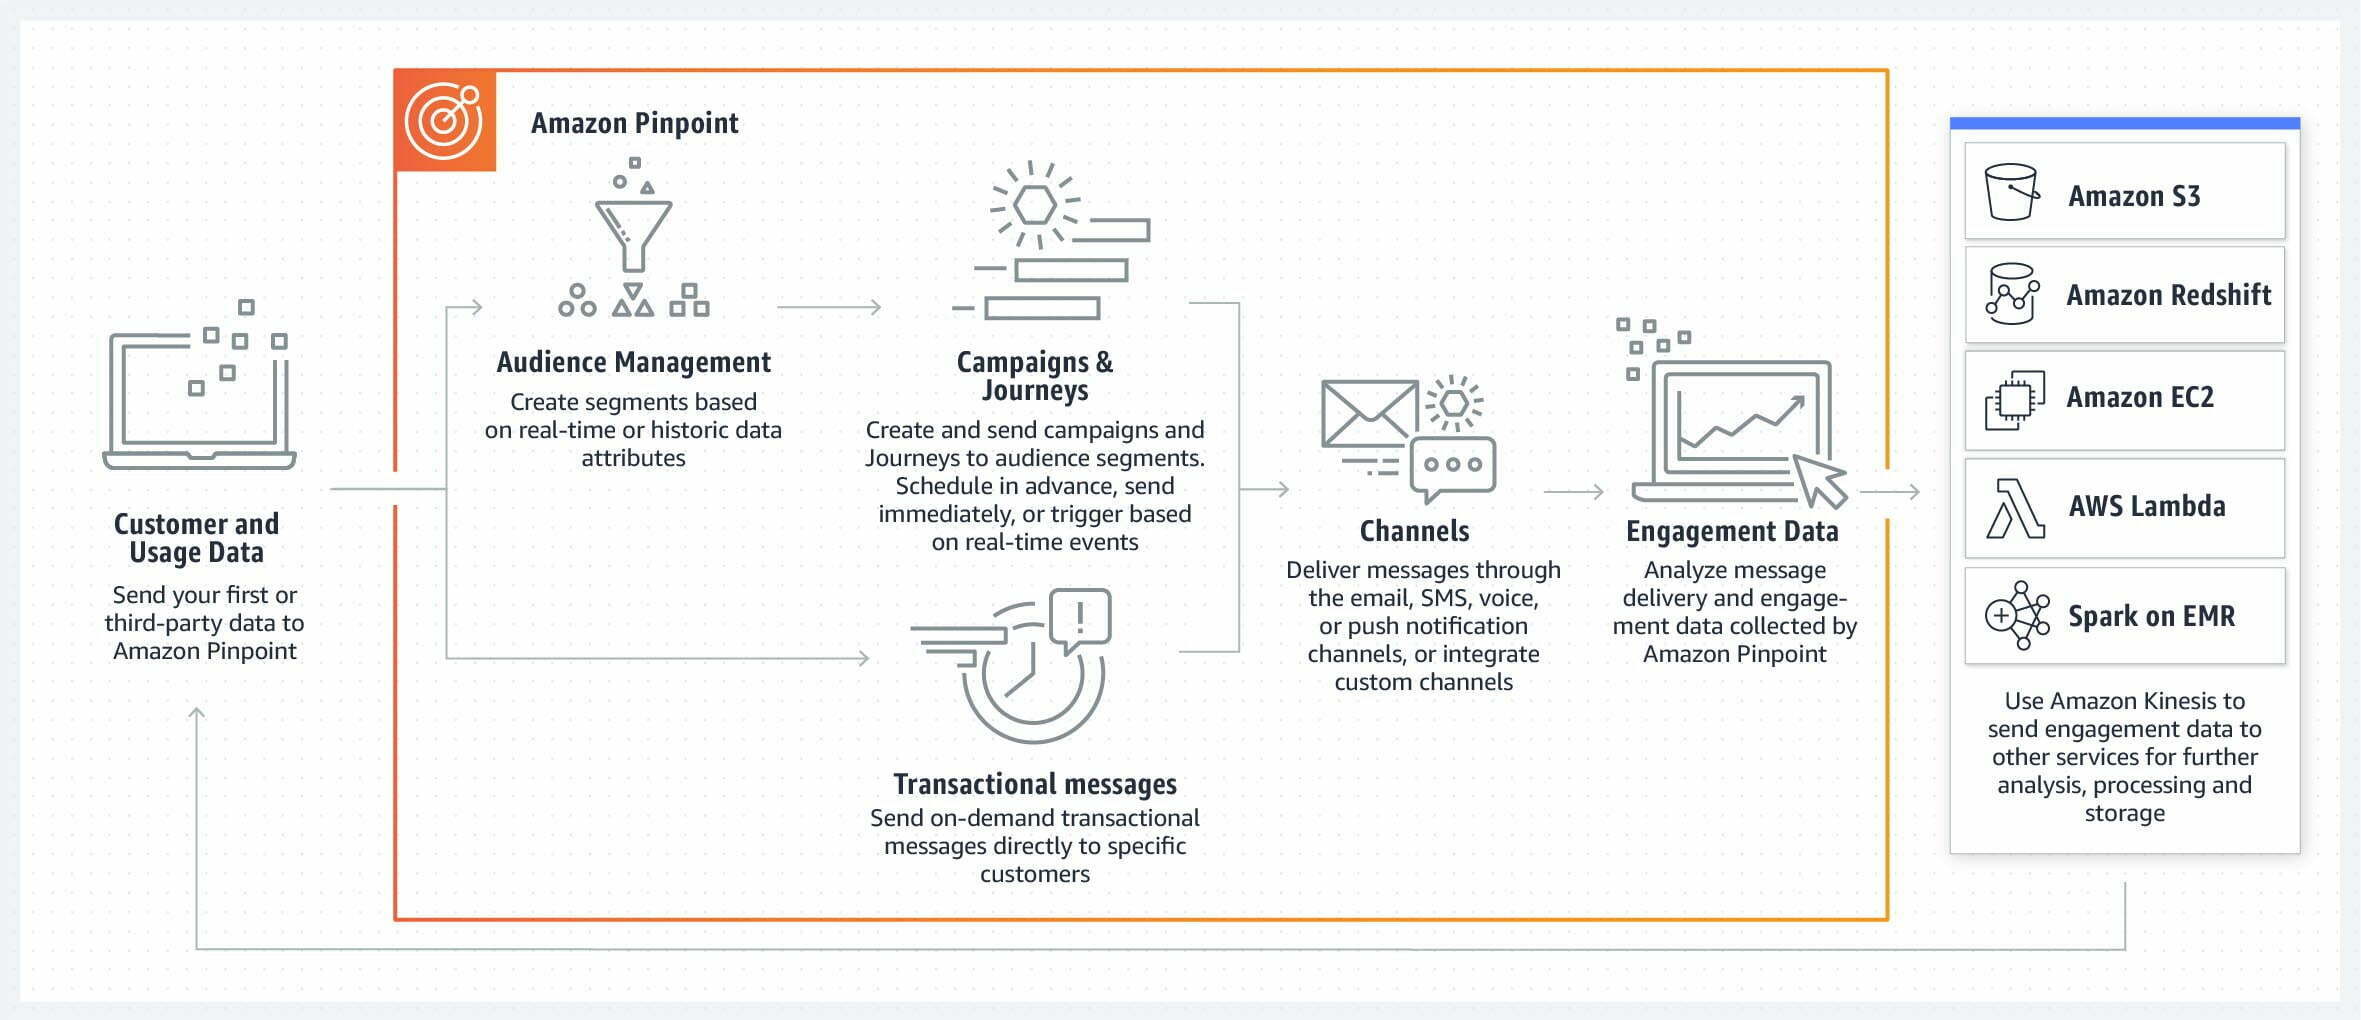 Source: https://aws.amazon.com/pinpoint/[/caption]
Prerequisites
- AWS Account
- AWS Management Console Access
- Basic knowledge of AWS, If you are new to AWS then read service pricing properly. Otherwise, AWS charges your card when the free tier limit is crossed.
- IAM User (Check my previous post)
AWS provides a lot of services and all those have their own pricing plan. Also, they provide free tires for most of the services with some limitations. You can check here for more details related to AWS free tires.
What we cover in this Pinpoint Series
Here, we will discuss the following in detail in this pinpoint tutorial series.
- Setup Pinpoint Project
- One way or Two way SMS communications
- Lambda functions with python to automate SMS sending script
- Setup SNS Topic to Handle Two Way user communication
- Setup AWS Trigger work as CRON
- SMS delivery report using AWS Kinesis Data Stream
Setup AWS Pinpoint Project
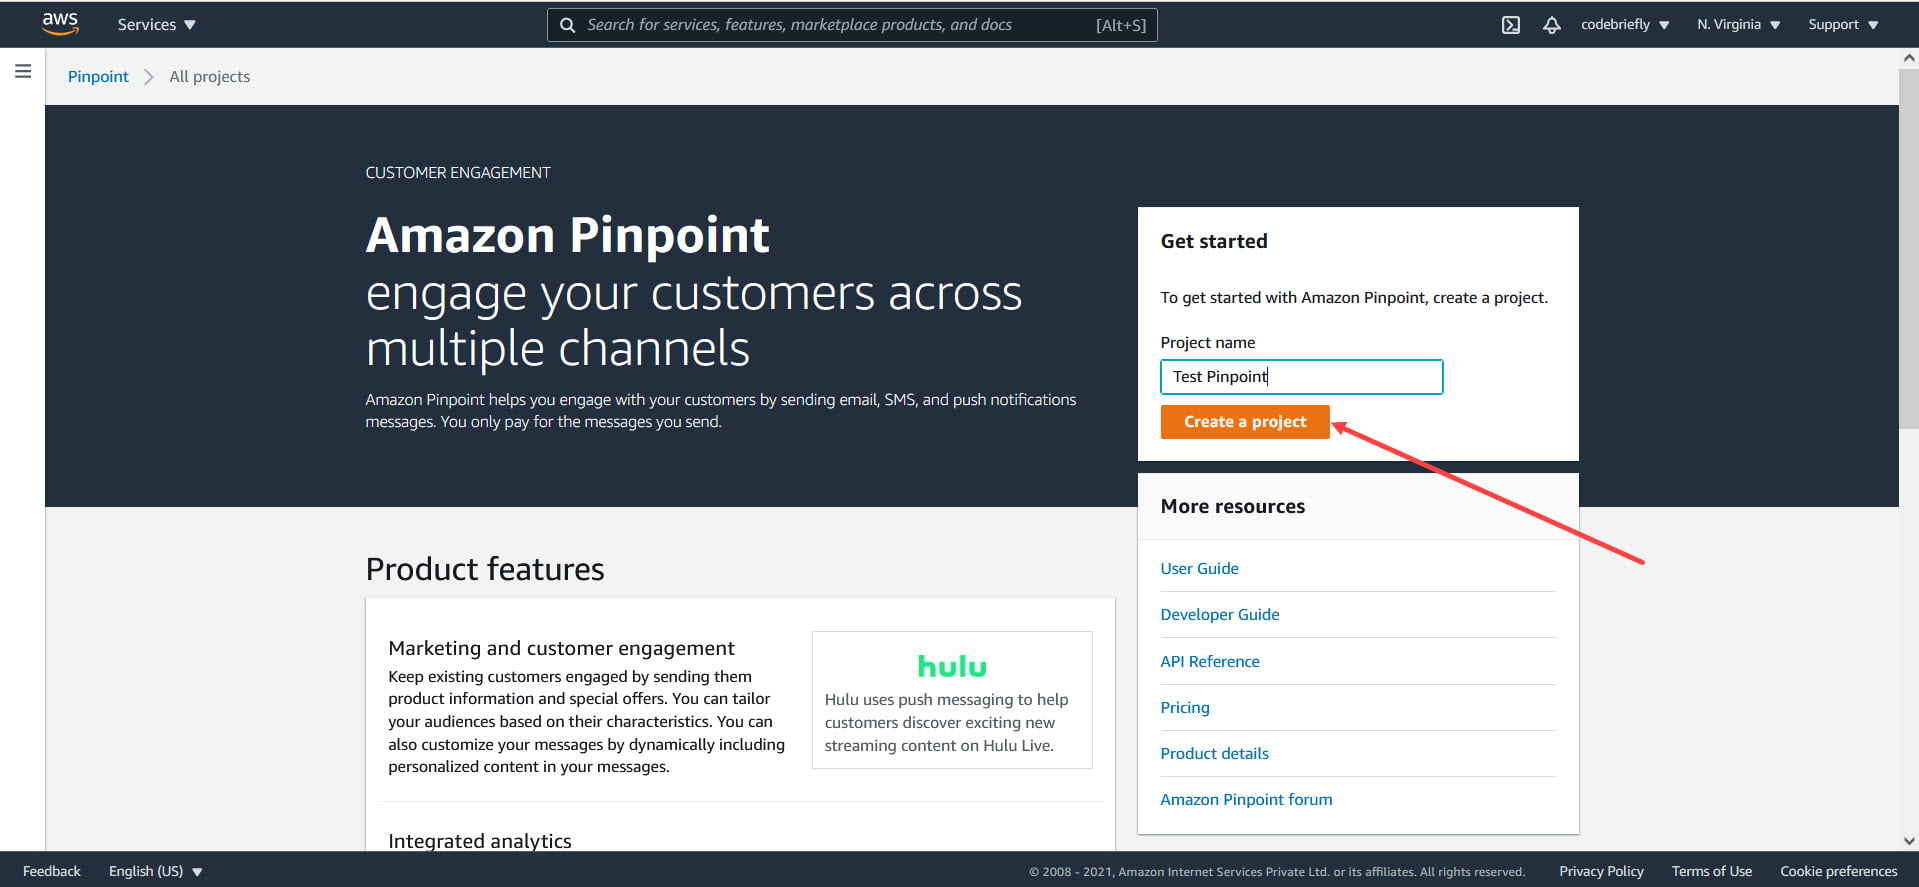
Login to your AWS account and go to Amazon Pinpoint Console. Here add the project name and click "Create a project".
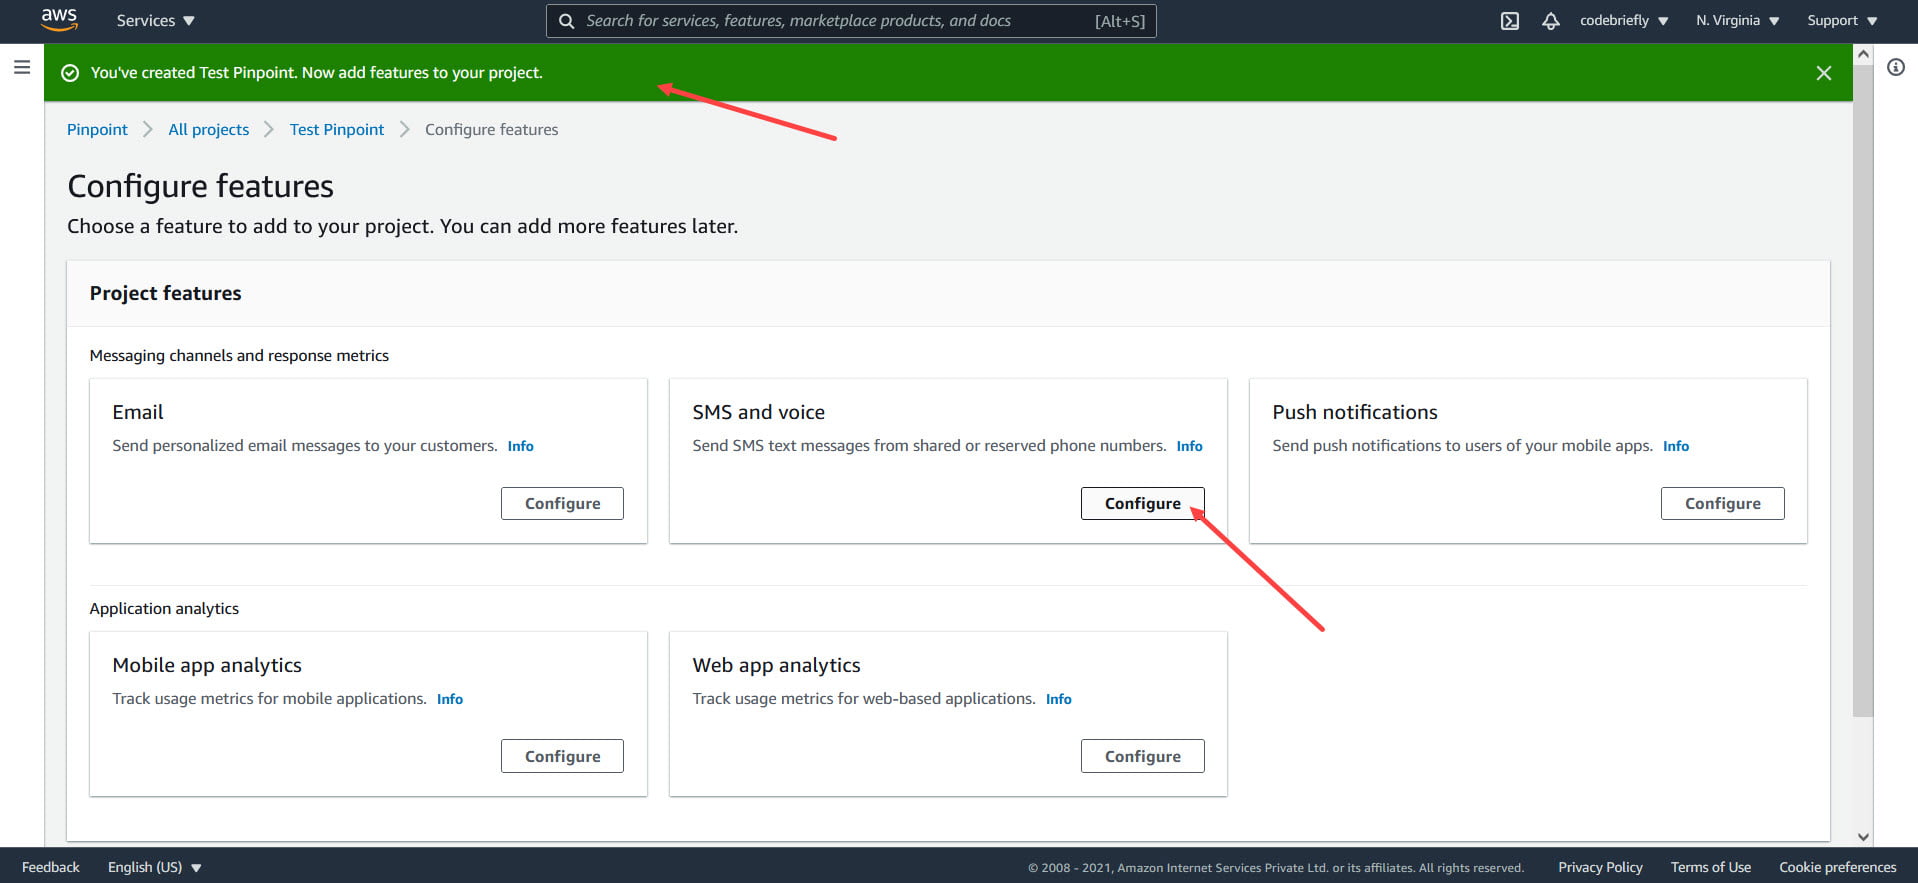
You will be redirected to the configure features screen. We have to choose SMS and voice and click the Configure button.
After clicking on confirm, we are redirected to the Set up SMS page.

Here, we have to select "Enable the SMS channel for this project". Also, set the default message type to Transactional.
Two types of messages such as:
Transactional: Messages that are critical or time-sensitive, for e.g: one-time passwords (OTP) or notifications.
Promotional: Messages that aren't critical or time-sensitive, for e.g: marketing messages, sales promotional messages.
Account spending limit: By default, the AWS sandbox spending limit is $1. You can increase the limit, but you have to request this to AWS support then they will approve your request. After that, you can update your spending limit here.
Account sender ID: This is an optional field, we can set the identity that appears on the recipients' devices.
Advanced configurations: This is an optional field, no need to apply any change here.
After all the changes are done, just click on "Save changes".

Here, we got our SMS and Voice feature, SMS is enabled now.
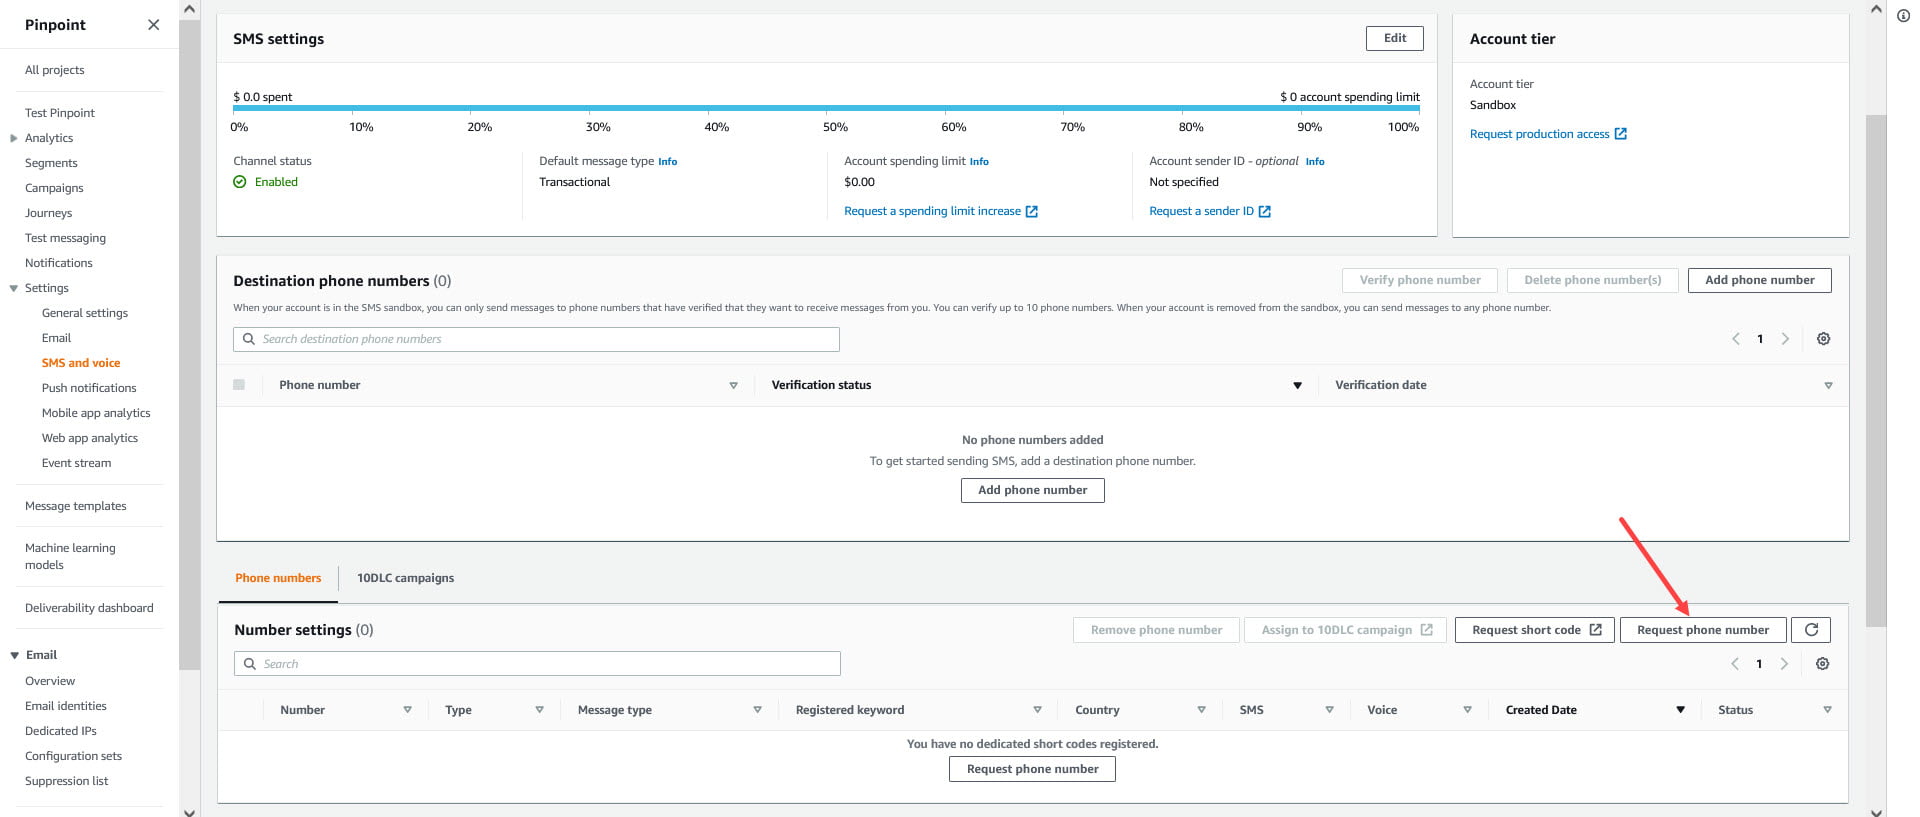
Let's click on the Manage button, we have been redirected to SMS and voice settings. Everything looks fine, now time to Request phone number. This will be used in the script for sending SMS notifications.
Note down, recently some features are changed by AWS. Three type phone numbers are offered by AWS such as:
Long Code: Support only voice messaging.
Toll-Free: Support both text and voice. Having limit to sending upto 3 messages per second.
10DLC: Support both text and voice messaging. It required the company and 10DLC campaign registration. You can get more details on 10DLC here.
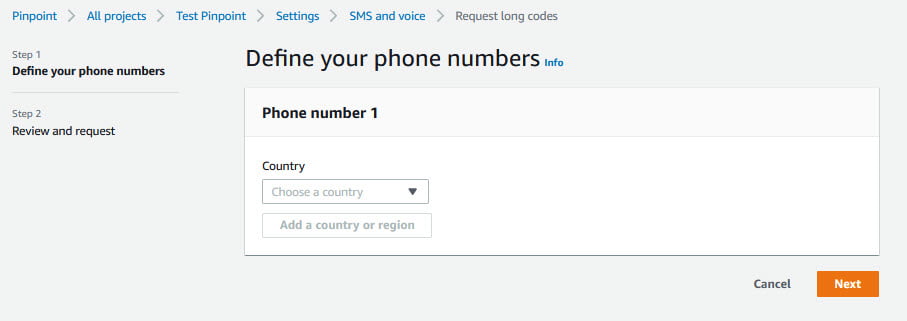
Select the country "United States", after selecting the country the rest of the fields are displayed on the screen. Let fill them and complete the process. Note that the Toll-Free number is not free of cost, it charges us $2 per month.
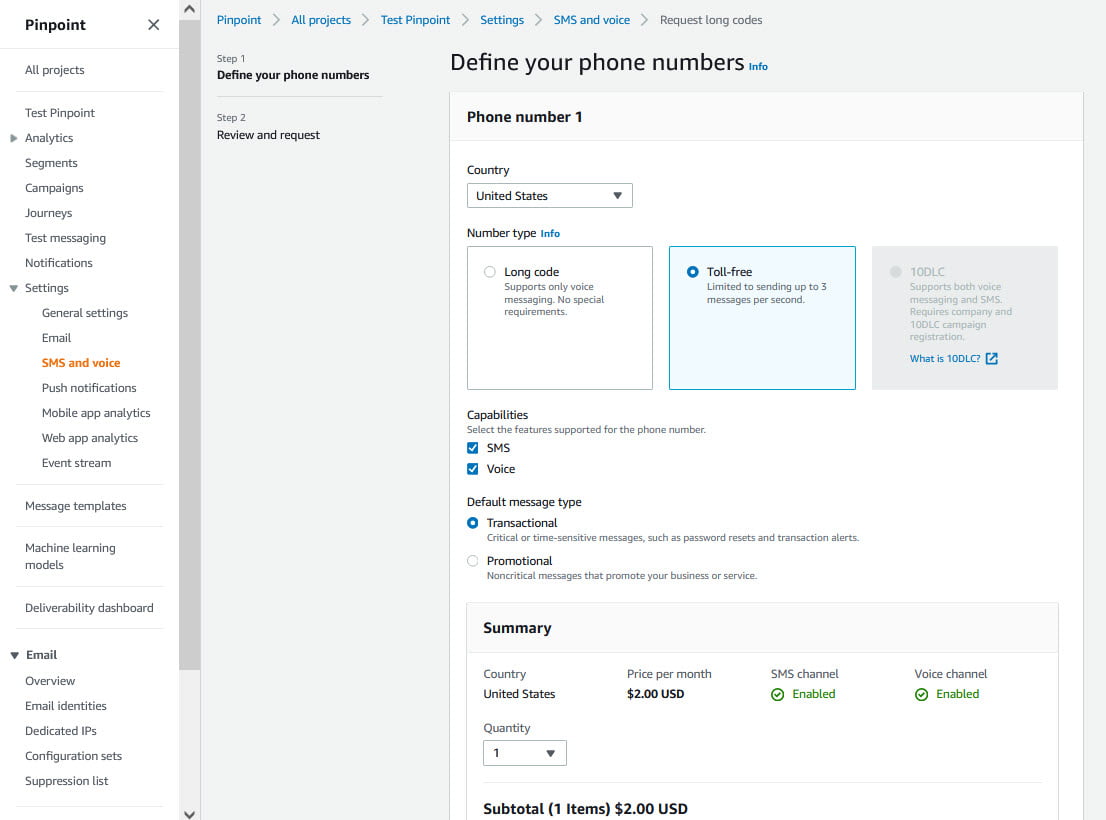
Here, choose both SMS and Voice under capabilities. Default message type set as Transactional, click on the Next button.
Now, we are redirected to the review and request screen.
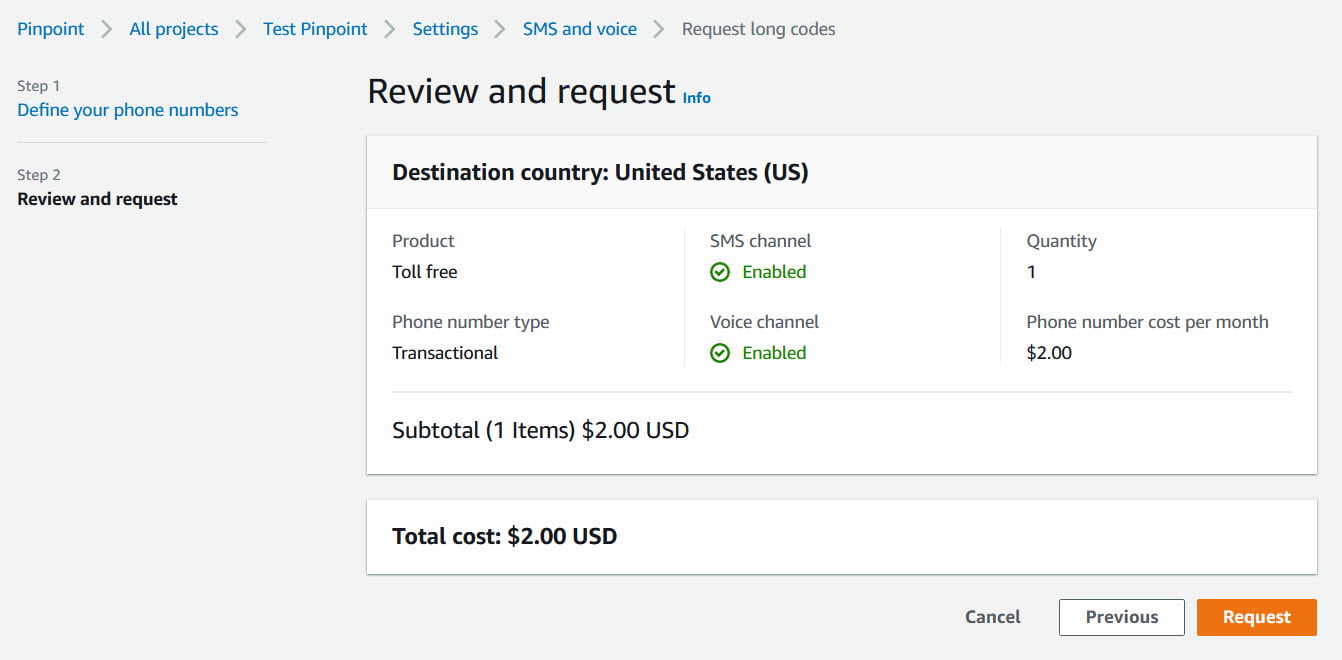
Just click on the Request button. Request long process is complete.
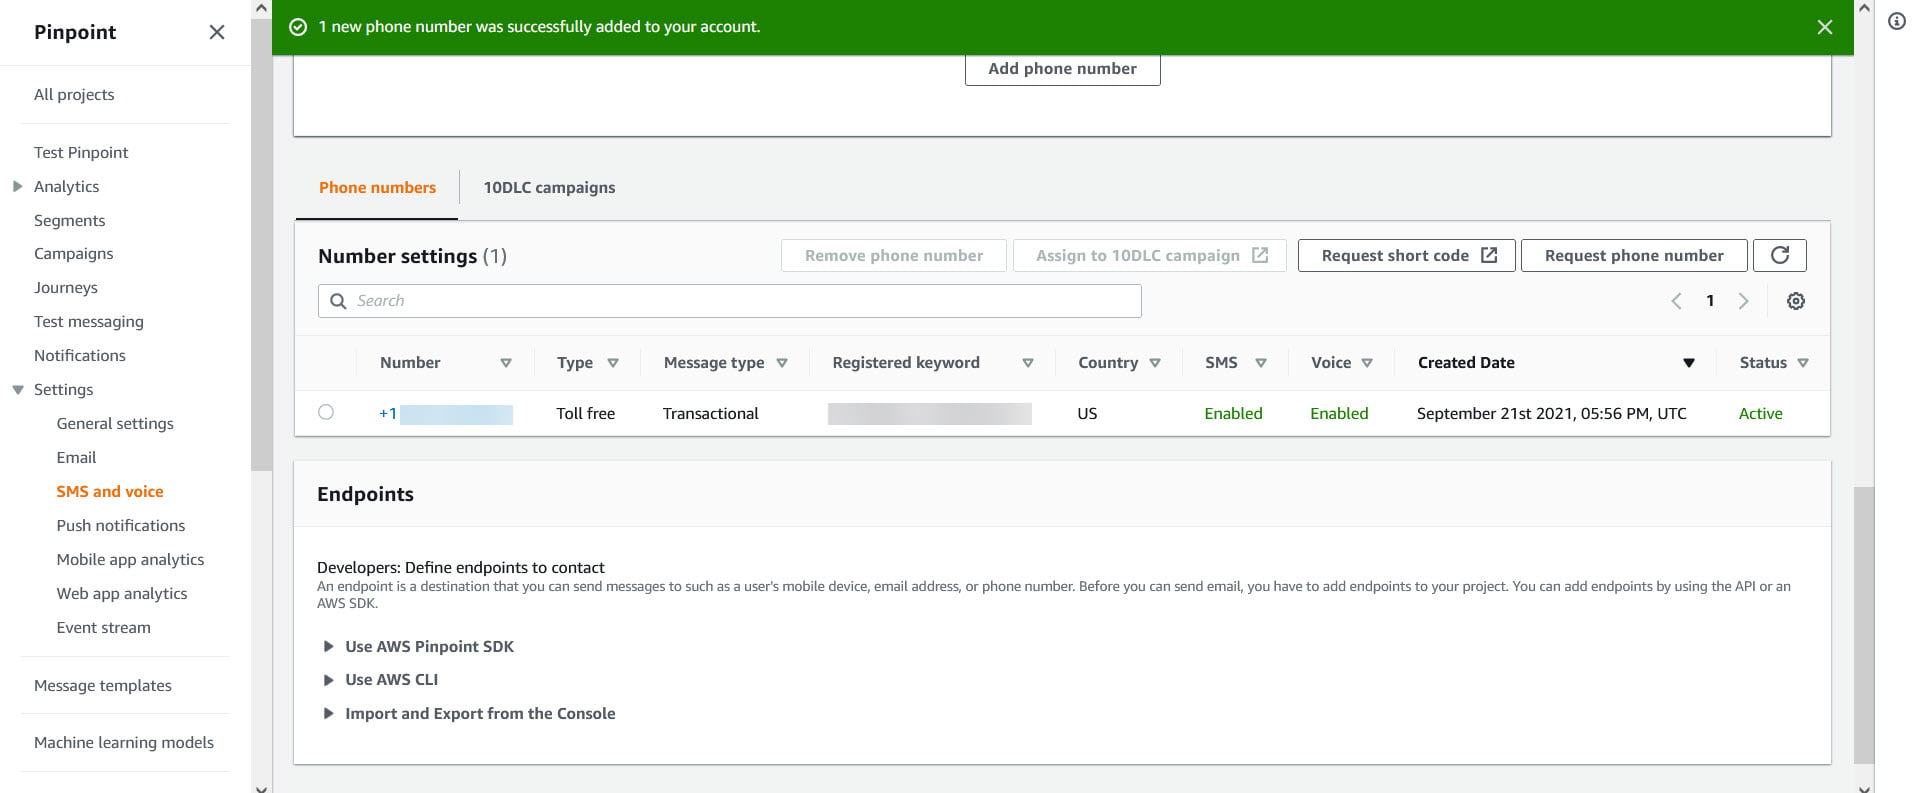
AWS allotted a toll-free number to us. We use this number with our SDK to send messages using pinpoint.
Conclusion
I hope you enjoyed this article, today we’ve explored “How to setup AWS Pinpoint”. We will discuss more on the Pinpoint, Lambda, Boto3, and other AWS services in our future articles. Please feel free to add a comment if any queries.
Keep Learning, Stay Safe

Comments
Post a Comment