In this article, we will discuss "How to Send SMS with AWS SNS using Lambda & Python". Amazon Simple Notification Service (AWS SNS) is a fully managed messaging service. You can check here for the pricing-related query, also amazon provides us the free tier for the same. We can use this service to send OTP, notifications messages.
[caption id="attachment_2591" align="aligncenter" width="1325"]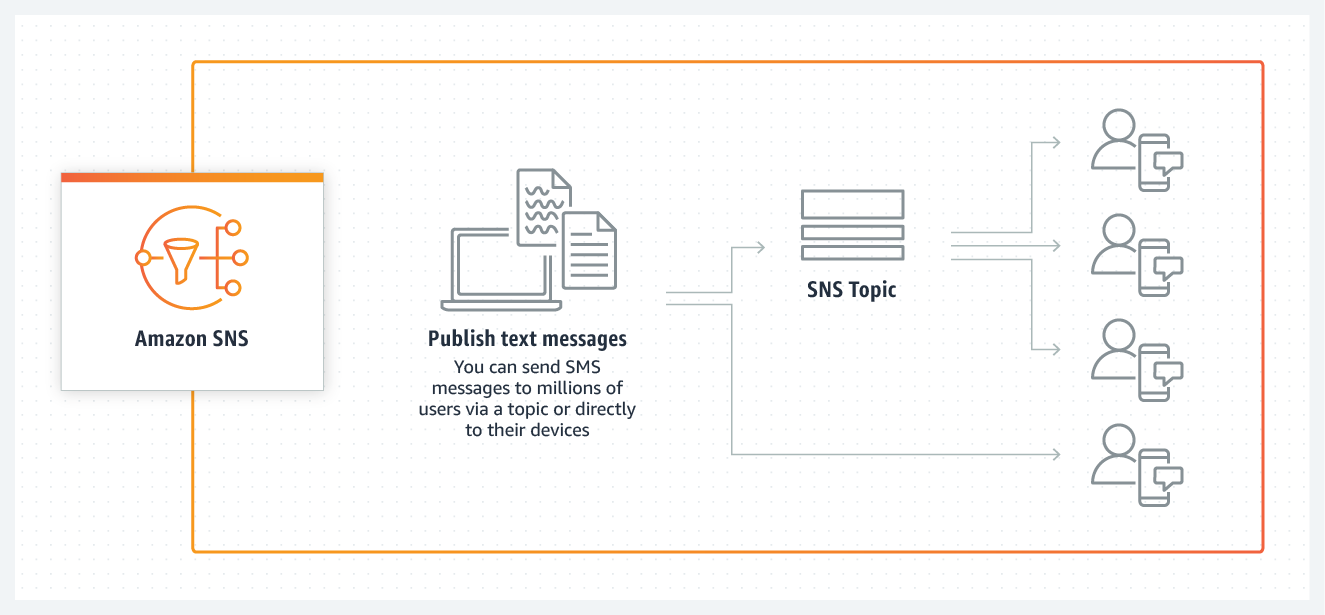 Source: https://aws.amazon.com/sns[/caption]
In this article, we will send an SMS with a message to a specified phone number using Lambda with Python and NodeJs or using PHP.
Prerequisites
- AWS Account
- AWS Management Console Access
- Basic knowledge of AWS, If you are new to AWS then read service pricing properly. Otherwise, AWS charges your card when the free tier limit is crossed.
Create AWS Access Key & Secret Key
Check my previous article "How to Create AWS IAM User with Programmatic Access".
After creating the IAM user, you got your Access Key and Secret Key. Those are used with SDK to send SMS.
Create Lambda Function
Go to Lambda Console on your AWS management console. Then click on create function.

There are four options available, here we have to choose "Author from Scratch" and fill in the basic information.
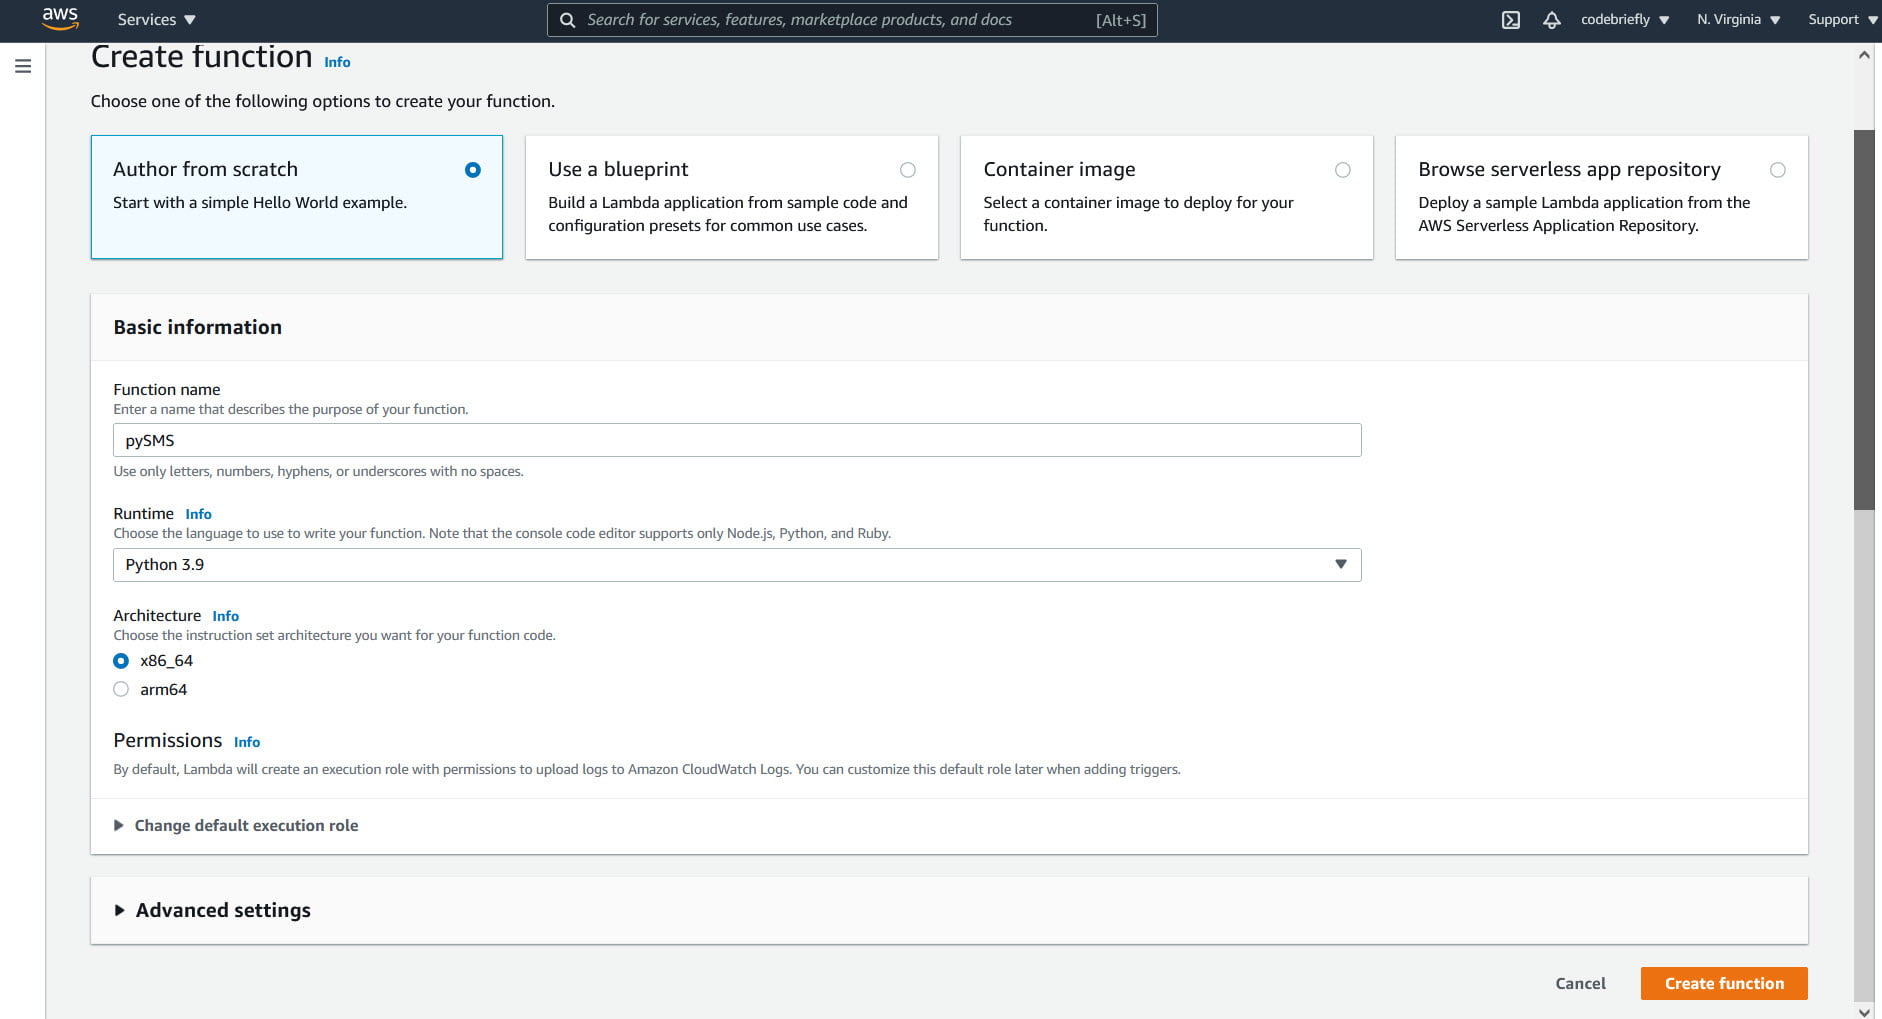
- For the execution role, we will choose to "Create a new role with basic Lambda permissions".
- In the advanced settings, there are other configurations but no need to apply any change. We will discuss more on the same in our future articles.
Click the "Create Function" button. Our function "pySMS" is created, your Lambda Dashboard will look like this.

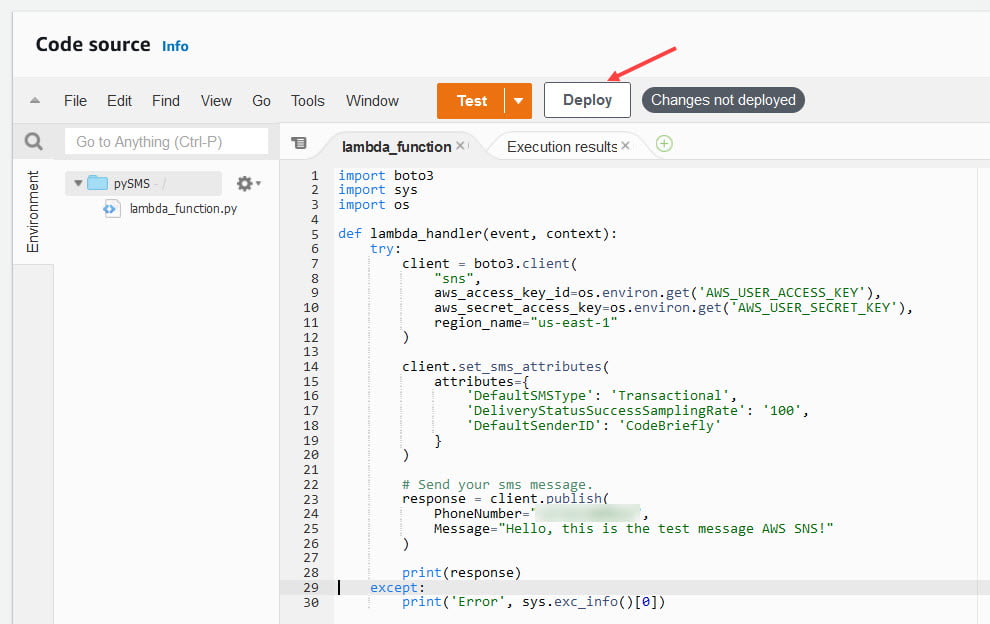
Open "lambda_function.py" and update the following code.
import boto3
import sys
import os

def lambda_handler(event, context):
 try:
 client = boto3.client(
 "sns",
 aws_access_key_id=os.environ.get('AWS_USER_ACCESS_KEY'),
 aws_secret_access_key=os.environ.get('AWS_USER_SECRET_KEY'),
 region_name="us-east-1"
 )

 client.set_sms_attributes(
 attributes=
 'DefaultSMSType': 'Transactional',
 'DeliveryStatusSuccessSamplingRate': '100',
 'DefaultSenderID': 'CodeBriefly'

 )

 # Send your sms message.
 response = client.publish(
 PhoneNumber="+1xxxxxxxxxx",
 Message="Hello, this is the test message AWS SNS!"
 )
 # print(response)
 except:
 print('Error', sys.exc_info()[0])
You have to use the region as per your needs, check here for more details. Let's attach the required policies to our lambda function. You can find this under the Configuration -> Permissions tab.
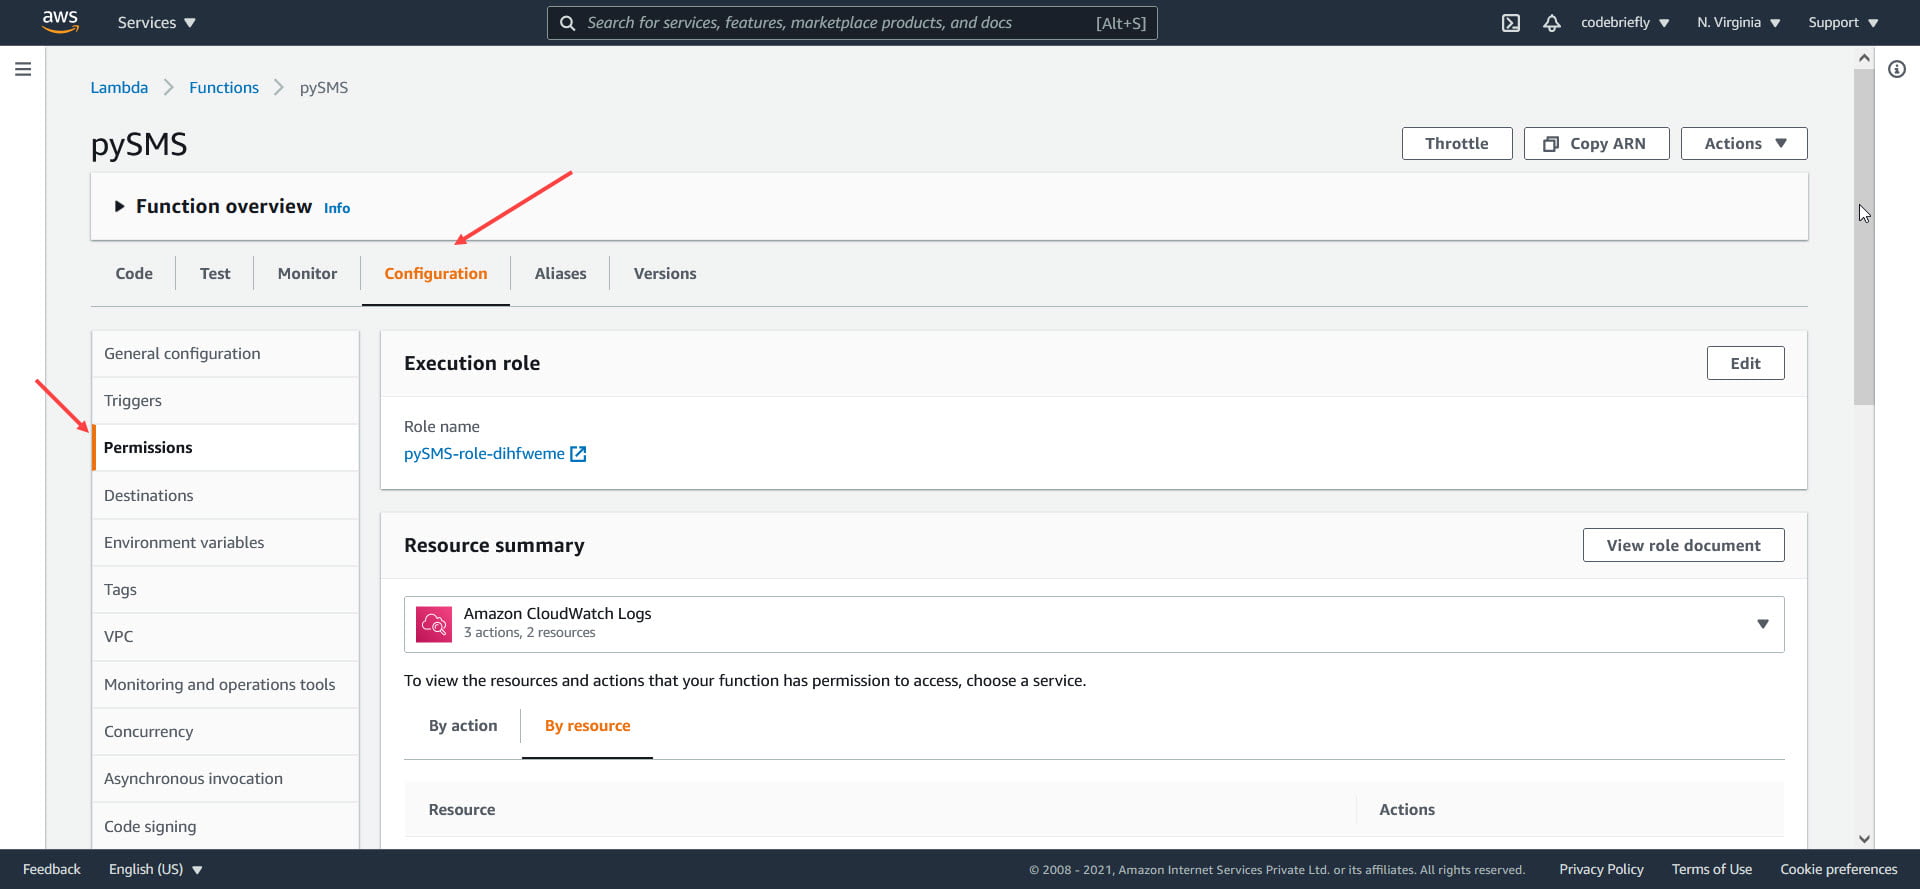
Adding policies to the lambda function. I’ve attached
AmazonSNSFullAccess which means Lambda has full access to SNS.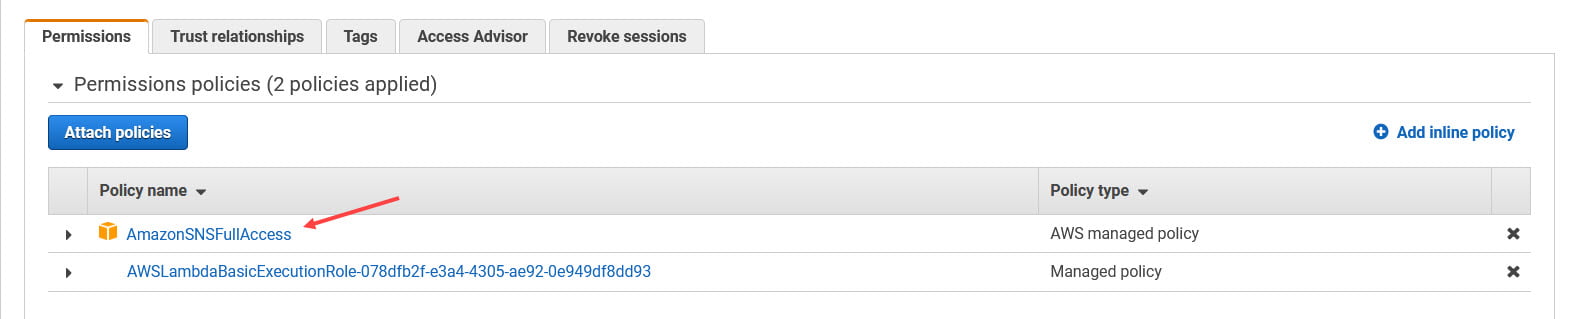
Now, time to deploy our code.
Let's test our code, we have to "configure test event". Choose "Create new test event" and enter the event name, then click on save.
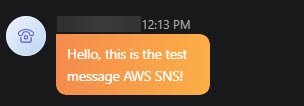
All are good, just need to click on the test button. I'm using my skype US number for testing and got my testing message.
Conclusion
I hope you enjoyed this article, today we've explored "How to send SMS with AWS SNS using Lambda & Python". We will discuss more on the SNS, Lambda, Boto3, and other AWS services in our future articles. Please feel free to add a comment if any queries.
Keep Learning, Stay Safe :)
You may like:
How to Create AWS IAM User with Programmatic Access
Handling Multiple File Upload in Laravel
Comments
Post a Comment