In this article, we will discuss "How to Manage Elastic IP in AWS?". Here, you will learn the use of Elastic IP addresses and how to assign it to your EC2 Instance.
If you are new with EC2 Instance then check out my previous article, "How to setup an EC2 Instance on AWS". EC2 (Amazon Elastic Compute Cloud) provide us an ability to create, start, stop and terminate the instance at any time. This will creates a challenge with IP addresses, because restarting an instance or replacing a terminated instance with newly created instance, will result in a new IP address.
Now the question is "How to reference a machine when the IP is constantly change?".
We can handle this situation with the use of Elastic IP address. We can associate a single Elastic IP address to different Ec2 Instances. You can immediately associate a new Ec2 Instance with the Elastic IP address if the EC2 instance is stopped or terminated. After the back-end EC2 instance changes, our existing application will not break because they the expected IP address is not changed.
Prerequisites
A running EC2 Instance. Check this "How to setup an EC2 Instance on AWS".
Create Elastic IP address
Login to your AWS account and go to EC2 Instance Console. Then, click to "Network & Security -> Elastic IP" as per the following screenshot.
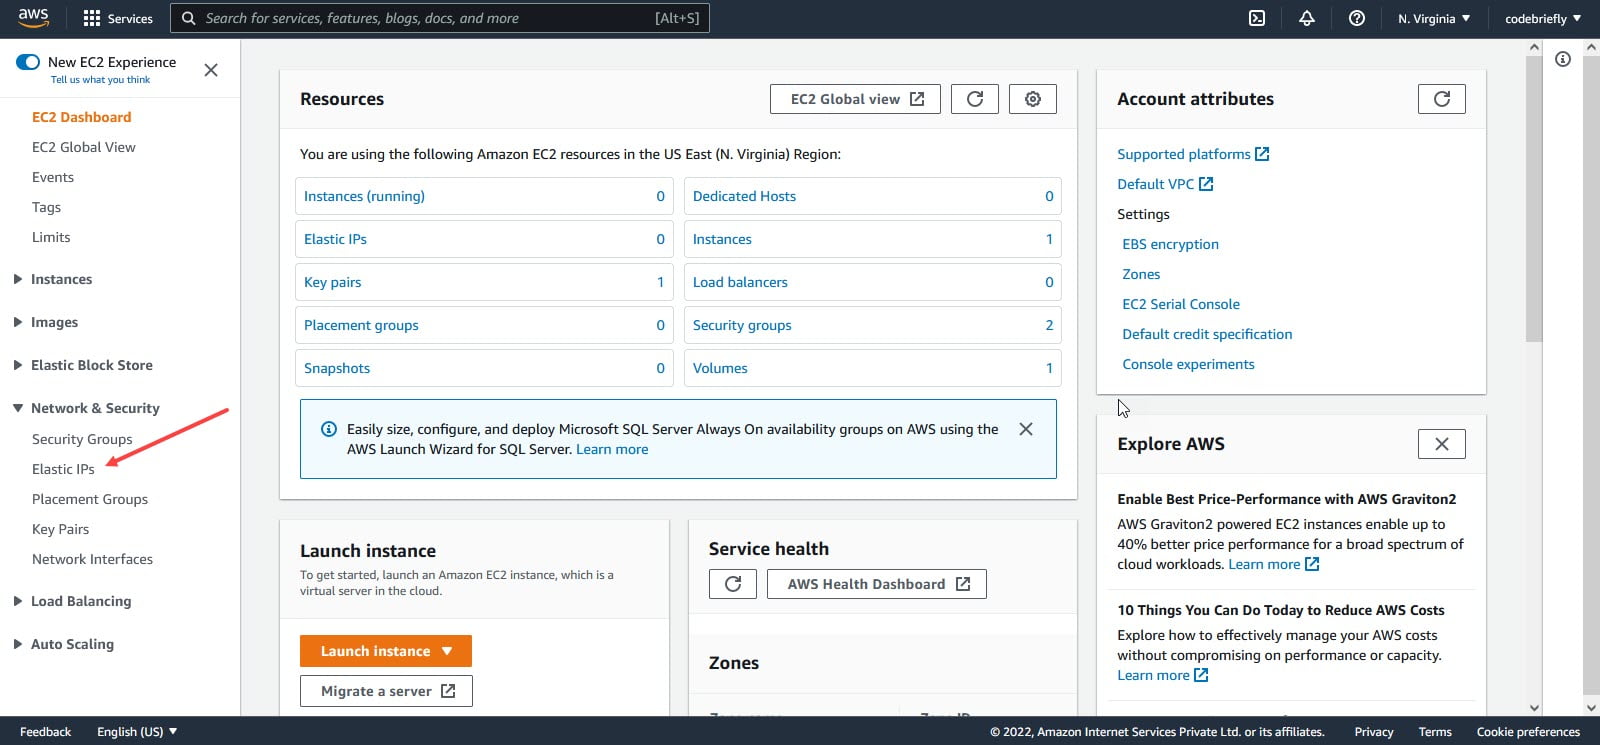
After that click on the "Allocate Elastic IP address".

Associate Elastic IP address
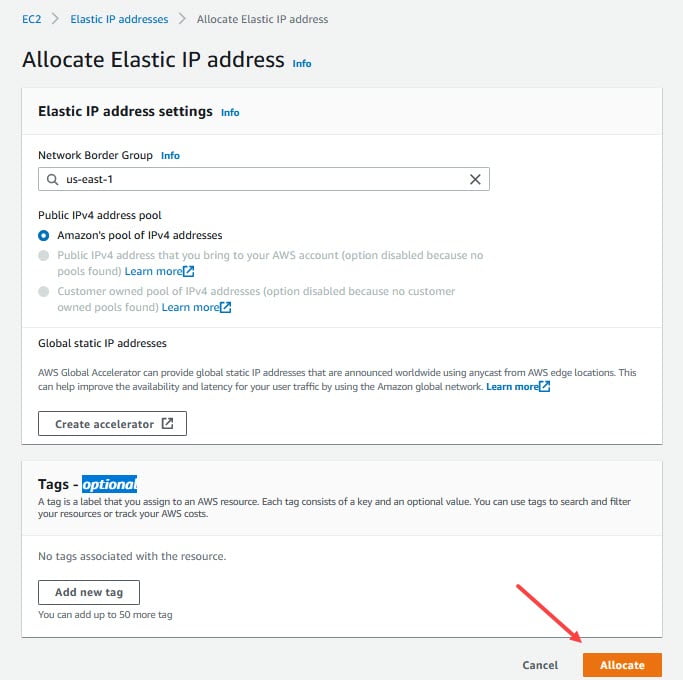
You have redirected to the "Allocate Elastic IP Address" screen. Here, click on the "Allocate" button.
After clicking on the Allocate button, you have redirected to the "Elastic IP Address" screen with successful notifications.
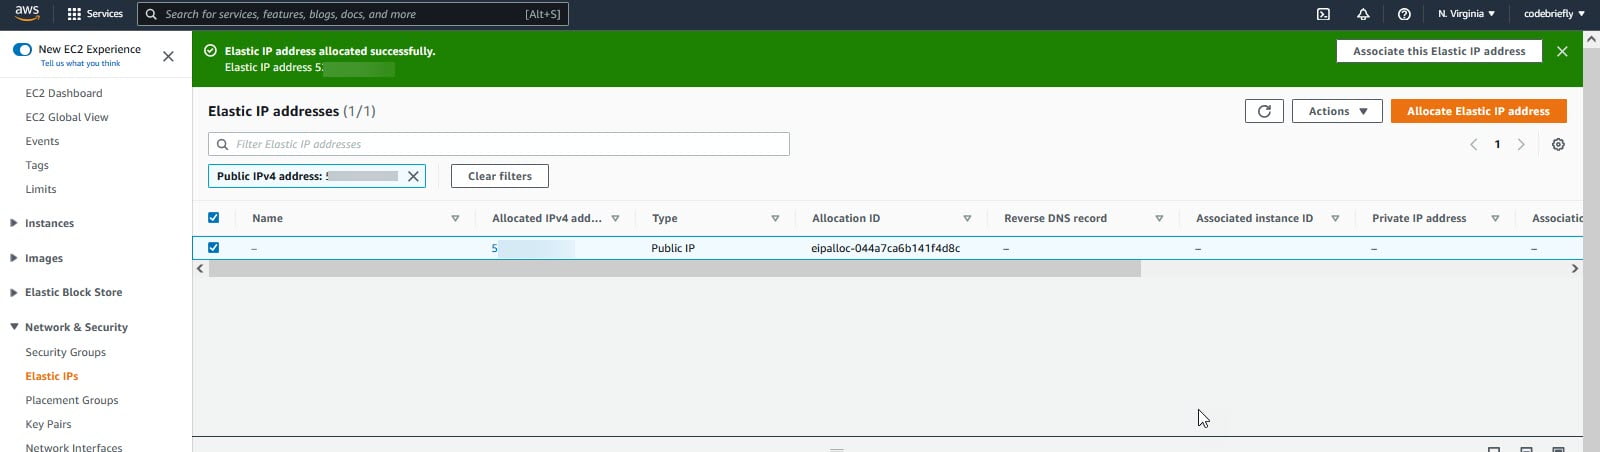
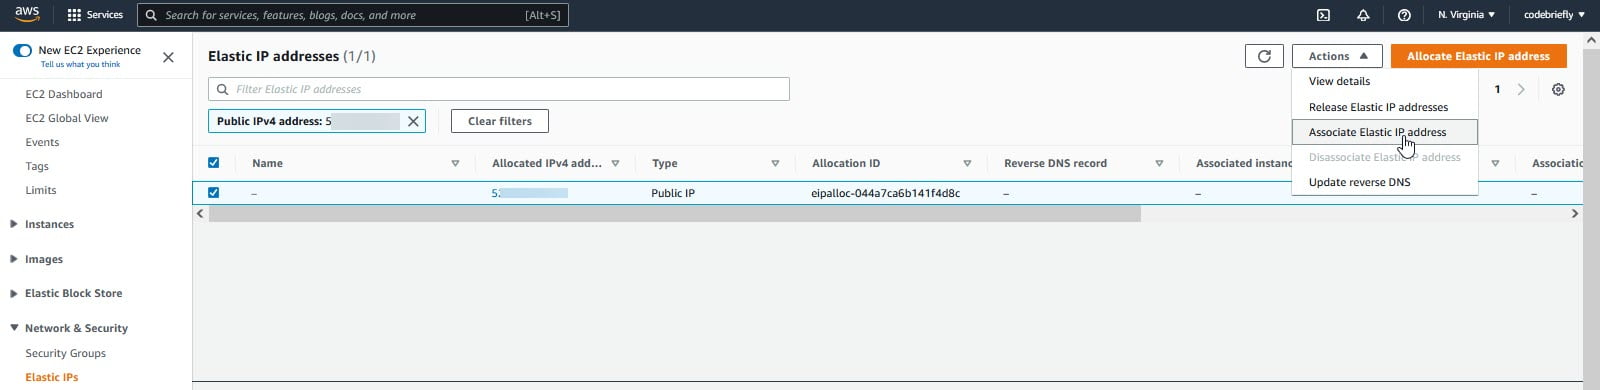
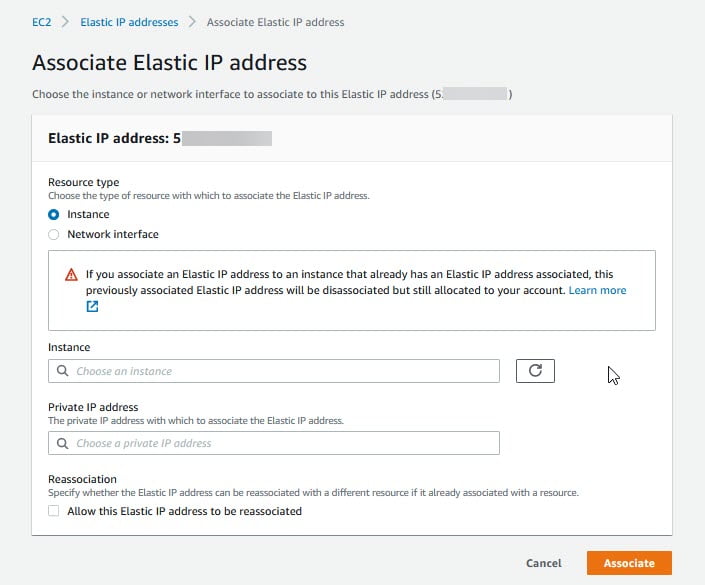
Once an IP is allocated we need to associate it with the EC2 Instance. Select the IP address and click "Actions -> Associate Elastic IP address".
In the Resource type choose "Instance" and choose the instance from the drop-down on the Instance field. If you have any other Elastic IP address assigned before and you need to re-associate then you can enable the checkbox in "Re-association". After applying those changes click on the "Associate" button.
Release Elastic IP address
It's mandatory to release the elastic IP address if not in the use. Otherwise, AWS charge you the IP addresses you created even if your instance is terminated or stopped. For more details you can check here. Before releasing the Elastic IP address, you have to "Deassociate the Elastic IP address".

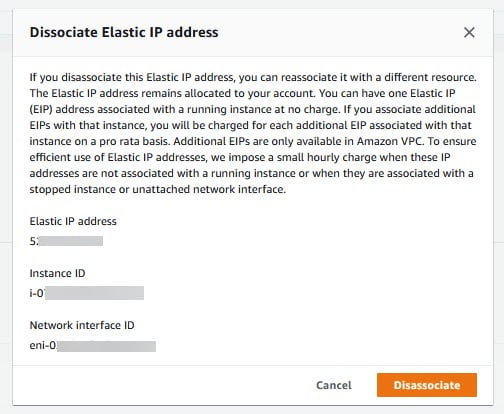
Click to the "Deassociate" button. After that we will redirected to the Elastic IP address dashboard.
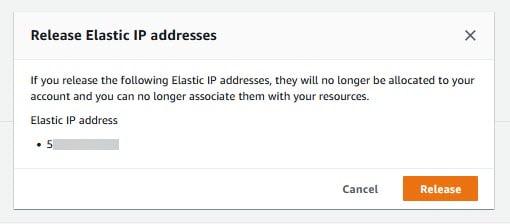
Now go to "Actions -> Release Elastic IP Addresses".

After click, a popup appears to release the IP address. Click on the "Release" button. That it, Elastic IP address is release from your account.
Conclusion
In this article, we are discussing "How to Manage Elastic IP in AWS?". Hope you like this article, I tried to explain the AWS Elastic IP Addresses in a simple and easy way. Please feel free to add comments if any queries or also send me feedback.
Keep learning & stay safe :)
You may like:
Basic Understanding on AWS Lambda
Manage AWS Lambda Versioning and Aliases
How to Upload File to AWS S3 Bucket Laravel
How to Send SMS with AWS SNS using Lambda & Python
Comments
Post a Comment